How to Create a Task Protocol or Protocol Template
You can create a protocol either inside of a Task or in the Protocol Templates section.
To create a protocol inside a Task:
- Create a new Task or navigate to the desired task page
- Enter the task card by clicking on the name
- Name your protocol by clicking on the gray Protocol title
- Enter an optional protocol Description below the protocol title
- Click the + New step button to add your first step

- Name the Step then click Insert to the right of the step name

- You can add tables, checklists, text, and/or files to your protocol step by clicking on the desired content in the Insert content dropdown. These content blocks are available:
- SciNote Tables
- Well plates (different sizes available)
- Checklists
- Rich text fields (Text)
- Tip – you can paste URL's, use Smart Annotations, upload image files, and also create tables within Rich Text Fields
- Files - e.g., images, videos, PDFs, Word, Excel, GraphPad Prism, etc.
- *Any file type can be uploaded to SciNote, but there's a 350MB file size limit per individual file uploaded
- SciNote also has a native integration with MS Office, so you can create Word, PPT, and Excel Online files directly from Tasks. Learn more here.
- Genetic Sequencing Editor Tool and Chemical drawing tool add-ons are available. Reach out to your account representative if interested!
- Forms - audit-ready, reusable digital templates for entering key information directly into protocol steps
- The structured fillable forms feature was launched in April, 2025 and is available for select plans. Reach out to your account representative for more info!
- Continue clicking the + New step button (or + Add step button below an existing step) and adding content until your protocol is complete.
- SciNote also allows you to add in protocols steps from other published templates as you build out new protocol templates. Click Protocol actions --> Add protocol steps to access this feature.
- You can insert steps from multiple protocol templates, but ONLY if they're published and you have access. Select one or more steps from each template to insert, and these will be added to the end of the current protocol.
- If your Task protocol is linked to a Protocol Template, inserting steps from other templates will trigger the icon to change. When blue, this indicates that the protocol on the task itself has been modified from the protocol version of the template itself.
You can add more than one type of content block to an individual step by clicking insert multiple times.
To save a protocol you created directly on a Task as a new Protocol Template, follow this article.
To create a protocol in the Protocol Templates repository:
- Navigate to the Templates on the left side of the screen (main feature menu) and click on --> Protocol templates.

- Click the blue + New protocol template button.
- Enter the name for the protocol template
- Choose whether you would like to grant access to this template to all your team members (by selecting the access checkbox or not)
- Click on the blue Create button to create your new template as a draft
- Click into the Name of your new draft protocol to begin adding steps
- Click on the blue + New step button to create your first step.
- Name the Step then click Insert content to the right of the step name.
- You can add tables, checklists, text, well plates and/or files to your step by clicking on the desired content type in the dropdown.
- SciNote Tables
- Well plates (different sizes available)
- Checklists
- Rich text fields (Text)
- Tip – you can paste URL's, use Smart Annotations, upload image files, and also create tables within Rich Text Fields
- Files - e.g., images, videos, PDFs, Word, Excel, GraphPad Prism, etc.
- *Any file type can be uploaded to SciNote, but there's a 350MB file size limit per individual file uploaded
- SciNote also has a native integration with MS Office, so you can create Word, PPT, and Excel Online files directly from Tasks. Learn more here.
- Genetic Sequencing Editor Tool and Chemical drawing tool add-ons are available. Reach out to your account representative if interested!
- Forms - audit-ready, reusable digital templates for entering key information directly into protocol steps
- The structured fillable forms feature was launched in April, 2025 and is available for select plans. Reach out to your account representative for more info!
- Continue clicking the + New step button (or + Add step button below an existing step) and adding content until your protocol is complete.
- SciNote also allows you to add in protocols steps from other published templates as you build out new protocol templates. Click Protocol actions --> Add protocol steps to access this feature.
- You can insert steps from multiple protocol templates, but ONLY if they're published and you have access. Select one or more steps from each template to insert, and these will be added to the end of the current protocol.
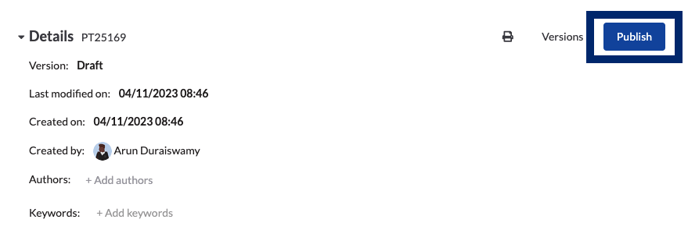
- Once you have added the desired steps, click the blue Publish button in the top right of the protocol template page to publish the protocol and make it available for use within your task(s).

Only those with 'Owner' or 'User' access for a Protocol Template can make edits or create new drafts, such as a changing the template name. Only 'Owner' users can publish Protocol Template drafts as a new version.
To load and link a published Protocol Template to a Task, follow this article.
To learn more about creating protocols watch our video tutorial.
If you have any additional questions, please do not hesitate to contact us at support@scinote.net. For more info about the Premium plans, request a quote.


