In this article we will cover how to edit and update inventory items. If you are looking to edit inventory columns, you'll want to check out this article here.
To edit an Inventory, you need to hold the permissions of Team Owner or User. If you are trying to edit an inventory that is owned by a different team and shared with your team, you'll want to make sure that the sharing team granted editing permissions.
1. How to edit an inventory item from the Inventory page
1a. How to edit a single inventory item:
- Head inside the Inventory that contains the item you wish to update
- Once inside, click the pencil next to the item that needs edited
- Update your information as needed.
- Click Save
1b. How to manually edit multiple inventory items at once in the inventory table:
- Head inside the Inventory that contains the items you wish to update
- Once inside, you have a few options to select your items:
- click the pencil icon next to each item
- OR
- tick the check box next to several items, click edit
- OR
- tick the check box at the top to select all items on the page, click edit - Update your information as needed.
- Click Save

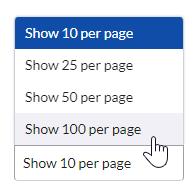
Editing multiple items at once is limited to 100 items at a time within the same inventory. To edit 100, be sure your show per page is set to 100.
1c. How to edit multiple inventory items at once via bulk import changes of item data:
Learn more about how to add new items via file import in this article.
- Click on the Import items button.
- A pop-up will provide more info and instruct you to choose a file.
- Use the Export all items button to exports a file (choose .XLSX or .CSV) with the current inventory items’ data.
.CSV exports have the dates exported in the same format as the user has set for Date Format in their individual user preferences.
This also means, that if importing to inventories from .CSV, the dates in the file MUST match the preferences format to import correctly. If they don't match, the dates won't import.
3. Make necessary changes to existing item data in the exported item import file so that it's ready for upload.
*When EDITING existing Items within a SciNote Inventory, you must keep the 'Item ID' data in the import file, or else SciNote will create new items. Remove the 'Item ID' only if you wish to create a new Item with a new 'Item ID'.
Make sure the first row of your import file includes the names of the columns from your SciNote Inventory!
Columns 'Added By', 'Created On', 'Updated on', 'Updated by', 'Archived by', and 'Archived on' are system-defined and system-generated.
You can leave these columns empty in your import file. They will be automatically updated in SciNote during the import process.
- You can click Import to select a file from your device, or simply drag and drop an import file into the blue box area
*Please note that a) File custom columns, b) Item Relationships (parent/child relationships), and c) columns with the "range" setting (date, date&time, or time columns with "range" enabled) cannot be imported into SciNote
4. Next you will map data to match the columns of your uploaded file to the columns in the SciNote inventory.
-
-
SciNote will automatically map the columns by matching column names from your imported file with the ones in your SciNote inventory. Review the mapped columns and click Confirm to continue with the import.
-
If you want, you can unselect the Auto-mapping function in the upper left and map the columns yourself manually instead
-
Matched columns that will are set to fully import are marked with a check mark symbol (✔️) and those that will not import are shown with an X (✖️) symbol in the Status column
-
-
5. Review and verify the Import preview.
-
From this popup, you can do a final review of the imported data. This preview displays pending changes resulting from the imported file. At this stage, you can still cancel the import by clicking Back.
- The preview indicates in green which items are newly added (New ) or which will be Updated after clicking Import.
- Any detected errors are marked in red (e.g., items with the same or a nonexistent Item ID in the file, items with no Name, etc.). These items/rows will be automatically omitted, however you can still import the other data.
- Duplicated rows indicate your import file has two rows with the same Item ID
- Invalid rows indicate that the listed Item ID doesn't exist in the SciNote Inventory

-
- If you have some Unchanged and or Archived items in the file, they will be marked in black (the default color).
6. Once you've reviewed the Import review, click Import to finalize the import changes to your inventory items and complete the item data edit via import.
IMPORTANT: Please note that when bulk updating items via import, the data in your import file will override the existing data in your SciNote inventory!
This action can’t be undone. We recommend exporting your current inventory data beforehand in case you need to revert any changes.
*Please Note: if you wish to import a date into SciNote, the Excel (.XSLX) format should be DD-MMM-YYYY. All inventory .XLSX export files export dates in this format, and the import for .XLSX will work best with this date format.
This does not apply when importing .CSV files.
2. How to edit an inventory item outside of the Inventory page (directly from Tasks or other SciNote pages)
2a. An inventory item can be edited anywhere you can access the item's card:
- Assign the inventory item to a designated task or use a hashtag to call the inventory item within any rich text field.
- Navigate to the specified location, where you will now find the inventory item represented as a clickable link.
- Click on the name of the inventory item link.
- An inventory item card will open on the right-hand side of the screen.
- Position your cursor over the desired properties, prompting a transformation into a pencil icon. This enables you to effortlessly edit the respective field.
- The edits are automatically saved when you click out of the field.
Please exercise caution when making alterations to inventory task cards within SciNote, as modifications are universally applied and will reflect in the updated format across all locations.
To learn more about how to bulk edit your inventory items in SciNote, check out our video below.
____________________________________________________________________________________
If you have any additional questions, contact us at support@scinote.net . For more information about the Premium plans, please request a quote.