How to Save and Reuse Advanced Inventory Table Filters
SciNote offers advanced inventory filters to strengthen and improve your search for specific items and repeated inventory table filtering.
To use this feature, go into one of your Inventories and look for the Filter icon on the right side (see picture below).
Adding new filters:
- Click the Filter icon.
- From the pop-up window, click the +Add filter button.
- This will open a list of columns in the current inventory which you can add as individual filters. Even columns that are hidden are able to be used for filtering.
- To make your selection, click the Column name from the list.
- Next, set your criteria (for example "contains" or "doesn't contain").
- Continue to add filters as needed. You can add multiple filters for the same column with different settings.
- When you are happy with the selected filters and their settings, you can apply them by clicking the blue Show results button.
Note: Different inventories will have different filters available as the filterable options are set by the columns.
Deleting filters:
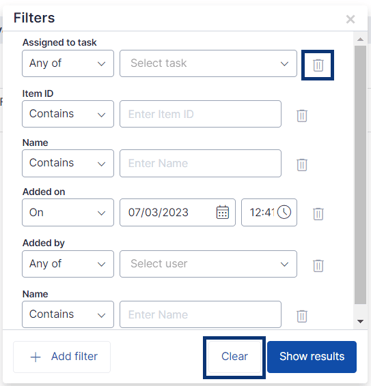
You can remove any filter using the Delete button (trash can icon) on the right or remove all filters at once using the Clear button as shown in this picture:
Saving filters:
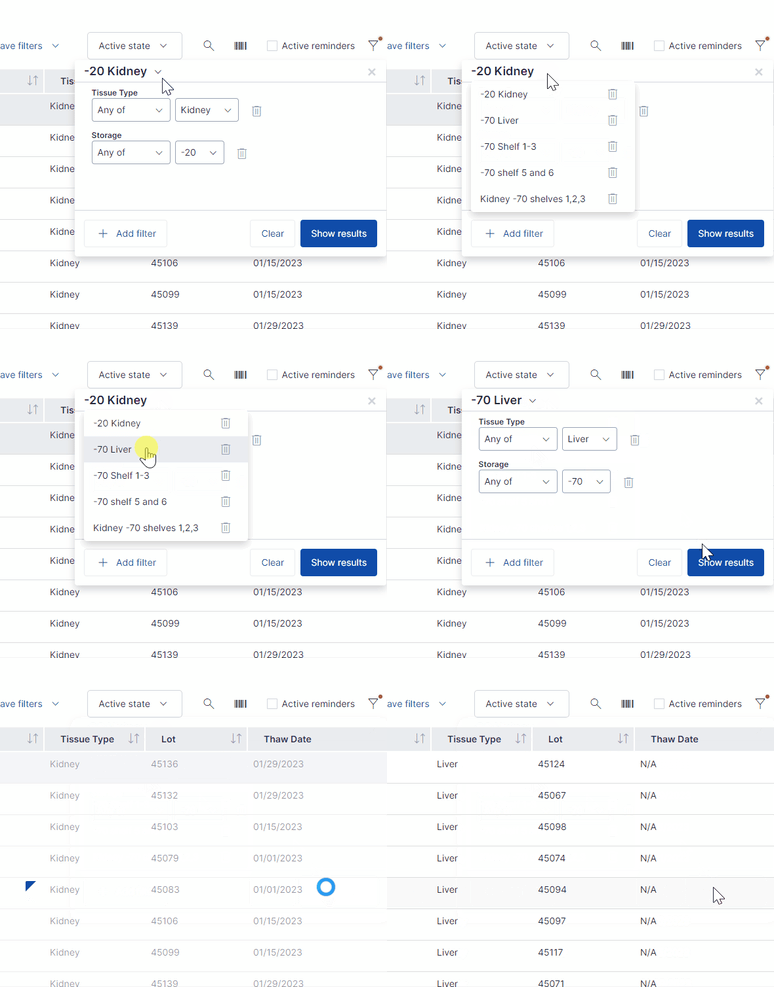
Once a filter is applied, you can save it for future use by clicking the Save filters button then +New Filter.
Loading saved filters:
You can access saved filters using the Filters dropdown menu in the top left corner of the filtering box.
Additionally, all saved filters in a shared inventory are accessible to every user of that inventory, not just the user who created it.
Deleting saved inventory filters:
The user who creates an advanced inventory filter can also delete the saved filter for their inventory. Just as you do when loading a saved filter, click into the Filters dropdown menu in the top left corner of the filtering box.
Then click the trash bin icon to permanently remove the saved filter.

To read more about advanced filters, please see this dedicated blog post.
______________________________________________________________________________________
If you have any additional questions, please don't hesitate to contact us at support@scinote.net. For more info about Premium plans, please request a quote.


